 使用django快速搭建微信公众号后台服务
wechatpy是一个python的微信公众平台sdk,封装了被动消息和主动推送的各种api,做公众平台开发时只需关注消息内容,无需处理xml解析等工作。 项目地址:https://github.com/jxtech/wechatpy 文档地址:http://docs.wechatpy.org/
# 开始搭建
# 环境配置
首先当然是安装django,安装wechatpy。 可参照 http://docs.wechatpy.org/zh_CN/master/install.html 完成wechatpy及其依赖的安装。
# 配置url和view
项目urls.py中配置相应url,指定到自己的名为mywechat应用中,如
urlpatterns = [
    url(r'^wx/', include('mywechat.urls')),
]
2
3
mywechat应用中配置url指定到某个view:
urlpatterns = [
    url(r'', views.handle_wx, name="wx"),
]
2
3
# view处理微信请求
views.py中写一个handle_wx方法,用于处理微信请求:
from django.http import HttpResponse, HttpResponseRedirect
from django.views.decorators.csrf import csrf_exempt

from wechatpy import parse_message, create_reply
from wechatpy.utils import check_signature
from wechatpy.exceptions import InvalidSignatureException
from wechatpy.replies import BaseReply

# 以下两个是自己定义的模块,位于wechat.util包下,分别处理文本和事件消息
from mywechat.util import reply_text, reply_event

TOKEN = 'xxxxx'  # 这里要指定一个token,后续填入到微信平台中

@csrf_exempt
def handle_wx(request):
    # GET方式用于微信公众平台绑定验证
    if request.method == 'GET':
        signature = request.GET.get('signature', '')
        timestamp = request.GET.get('timestamp', '')
        nonce = request.GET.get('nonce', '')
        echo_str = request.GET.get('echostr', '')
        try:
            check_signature(TOKEN, signature, timestamp, nonce)
        except InvalidSignatureException:
            echo_str = 'error'
        response = HttpResponse(echo_str, content_type="text/plain")
        return response
    # POST方式用于接受和返回请求
    else:
        reply = None
        msg = parse_message(request.body)
		# 判断消息类型,文本消息则调用reply_text进行处理
        if msg.type == 'text':
            reply = reply_text.do_reply(msg)
        elif msg.type == 'event':
            reply = reply_event.do_reply(msg)
        else:
            pass
        if not reply or not isinstance(reply, BaseReply):
            reply = create_reply('暂不支持您所发送的消息类型哟~ 回复“帮助”查看使用说明。', msg)
        response = HttpResponse(reply.render(), content_type="application/xml")
        return response
2
3
4
5
6
7
8
9
10
11
12
13
14
15
16
17
18
19
20
21
22
23
24
25
26
27
28
29
30
31
32
33
34
35
36
37
38
39
40
41
42
文本、图片、语音等很多消息类型均支持,详情参见:http://docs.wechatpy.org/zh_CN/master/messages.html#
# 处理文本请求
新建reply_text.py,用于处理文本类消息。
from wechatpy import parse_message, create_reply
from wechatpy.replies import TextReply, ArticlesReply
from wechatpy.utils import check_signature
from wechatpy.exceptions import InvalidSignatureException


def do_reply(msg):
    reply = None
    try:
        if msg.content == '天气':
		    # msg.content即为消息内容
            reply = create_reply('相关回复文本', msg)
        else:
            reply = create_reply('没有此关键词', msg)
    except Exception as e:
        print 'error:', e
    return reply
2
3
4
5
6
7
8
9
10
11
12
13
14
15
16
17
# 处理事件请求
可以对用户的关注、取关等事件进行处理。如果消息类型为event,则会被view调用reply_event.py进行处理。
from wechatpy import create_reply

# 响应用户关注/取关事件
def do_reply(msg):
    reply = None
    try:
	    # 关注事件
        if msg.event == 'subscribe':
           reply = create_reply('你好呀', msg)
        elif msg.event == 'unsubscribe':
            # 用户取关
            pass
        else:
            reply = create_reply('暂不支持您发送的内容', msg)
    except Exception as e:
        print('error:', e)
        reply = create_reply('出错了', msg)
    return reply
2
3
4
5
6
7
8
9
10
11
12
13
14
15
16
17
18
支持更多类型的事件,详细可以查看wechatpy的文档:http://docs.wechatpy.org/zh_CN/master/events.html
# 调试环境下的外网映射
完成以上代码后,可以处理简单的关注和取关事件,并响应文字消息了。此时,需要先将调试环境映射到外网,可以用花生壳这个软件:http://hsk.oray.com/ , 可免费用来在测试程序时将本地服务映射到外网。
比如,绑定了 testwx.imwork.net 的域名(端口为80),映射到 127.0.0.1:8000.
# 配置公众号后台
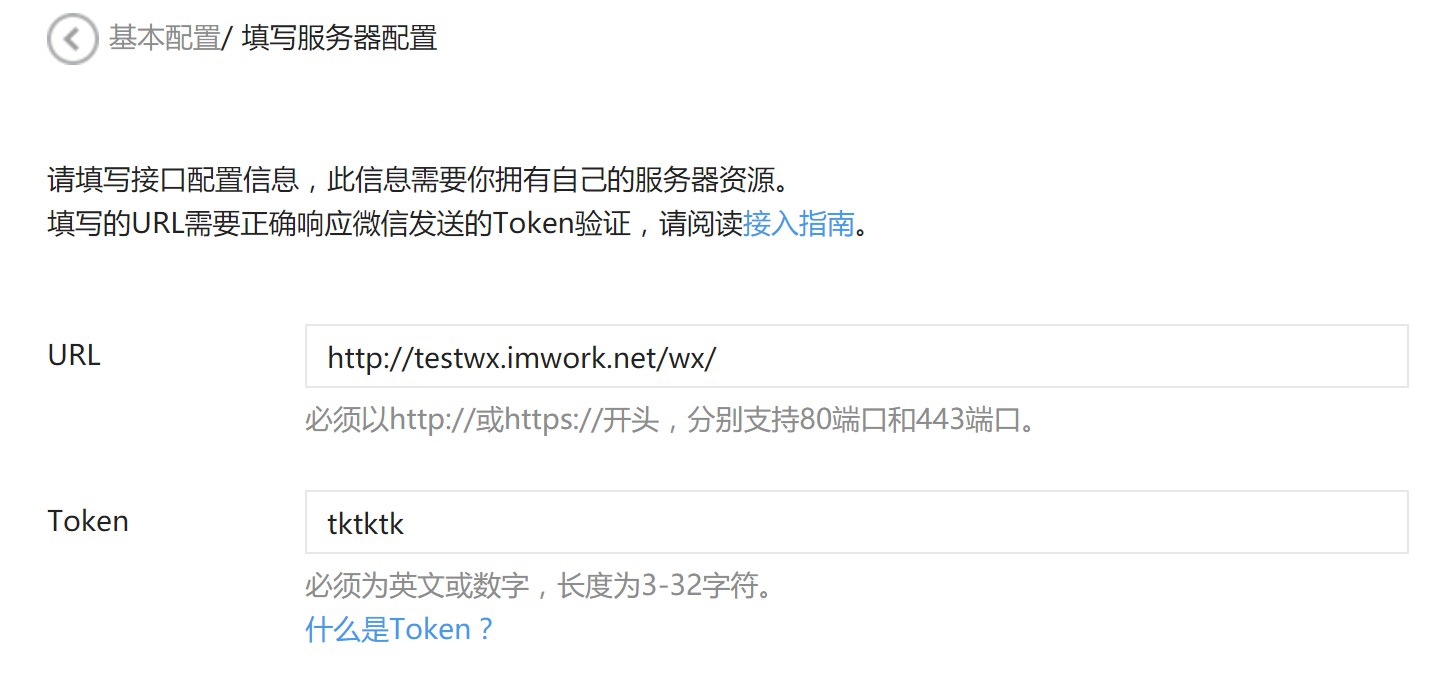
公众号后台也需要进行配置,进入“开发——基本配置”,填写服务器配置。 url写为刚才申请到的域名,并注意后面与django中的url一样,即应当写为 http://testwx.imwork.net/wx/。 令牌(token)则是与上面view中的token相同。

可选择明文方式的消息,也可根据需要选择加密消息。 配置完成后,点击保存时,公众号后台会向指定的url发送一次GET请求,如果代码没问题的话,则程序会返回预定的值,无误后即完成绑定。
然后在公众号中回复文字,就能收到相应的消息了,公众号后台最基础的开发就完成了。
这里只简略写了最基本的配置,如果需要支持更多类型的事件或消息,或者主动通过api接口向公众平台推送,请参阅wechatpy的文档吧,同时,有的操作也需要公众号具有相应的权限才可以。
# ref.
http://www.cnblogs.com/ryhan/p/5011962.html